Top tips on how to paint your garden shed

Painting a shed can be a fun and rewarding DIY project that can transform the look of your outdoor space. Whether you’re looking to add a pop of colour to your garden or simply want to freshen up the look of your shed, a fresh coat of paint can make a big difference. Here’s a step-by-step guide on how to re-paint a shed:
- Prepare the surface: Before you start painting, it’s important to properly prepare the surface of the shed. Begin by cleaning the shed thoroughly, removing any dirt, dust, or cobwebs that may have accumulated. You can use a pressure washer, a scrubbing brush, or a garden hose to remove any debris. Once the shed is clean, use a putty knife or scraper to remove any peeling or flaking paint. If the shed has any holes or cracks, fill them in with wood filler.
- Sand the shed: Once you’ve prepared the surface of the shed, it’s time to sand it. Sanding will help to create a smooth surface for the new paint to adhere to. Use a medium-grit sandpaper and sand the entire surface of the shed, including the door and window surrounds.
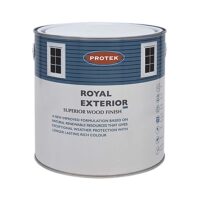
- Paint the shed: Now it’s time to apply the paint. Choose a high-quality exterior paint (we recommend Protek Royal Exterior that is specifically designed for use on sheds and other outdoor structures). Use a paintbrush or roller to apply the paint, starting with the door and windows and working your way outwards. Be sure to apply the paint in thin, even coats, and allow each coat to dry completely before applying the next. Depending on the size of your shed and the type of paint you’re using, you may need to apply multiple coats to achieve the desired coverage.
- Finish up: Once you’ve applied the final coat of paint, allow the shed to dry completely before adding any hardware or decorations. If you’re using a brush to paint, be sure to clean it thoroughly with soap and water to remove any paint residue. If you used a roller, simply dispose of it according to the manufacturer’s instructions.
Painting a shed can be a time-consuming project, but the end result is well worth the effort. By following these steps, you can transform the look of your shed and create a beautiful and functional space that will last for years to come.
